Many writers are fans of Screenplayed – a social media channel that plays films and their screenplays in sync, revealing the beauty of writing, acting and direction. If you are a newbie, watch the video below to get a sense of what such videos look like.
Many of our ~2000 users use Scrite for learning and teaching screenwriting, in addition to writing their short and feature films. Screenplayed videos are especially useful for learning and teaching purposes. One of our early adopters (Prashanth) even suggested this feature long back on our Forum.
Infact, we feel that film makers will find it useful to contrast their film with screenplay during and after edit.
Starting from 0.5.5 Beta, you will be able to read screenplays along with the video of the film. This feature is a work in progress and experimental, so your feedback will be very useful. In the following sections, we explain how to use this feature.
Icons On Main Window Tabs
When you start Scrite 0.5.5 beta, you will notice that the main-window tabs now sport icons, instead of text.
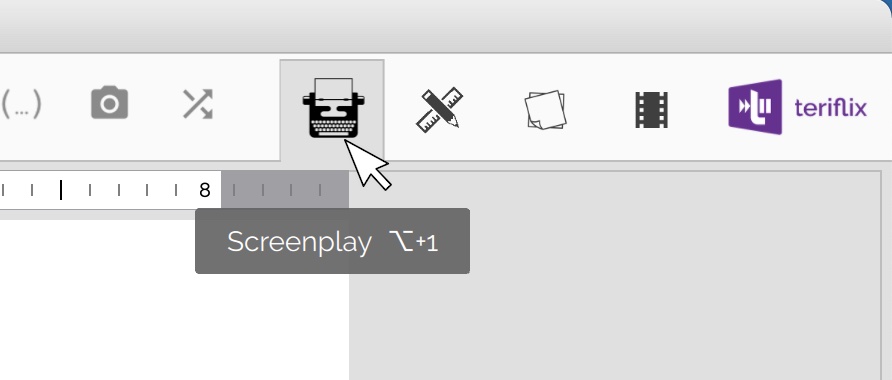
Changing tabs from text to icons, gave us some much needed space on the toolbar.
You will notice that there is now a new tab on the extreme right – which we call Scrited.
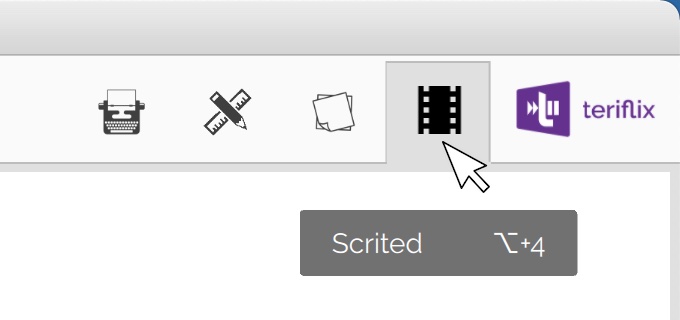
Introducing ‘Scrited’ Tab
When you switch to this tab, you will see a UI like this.
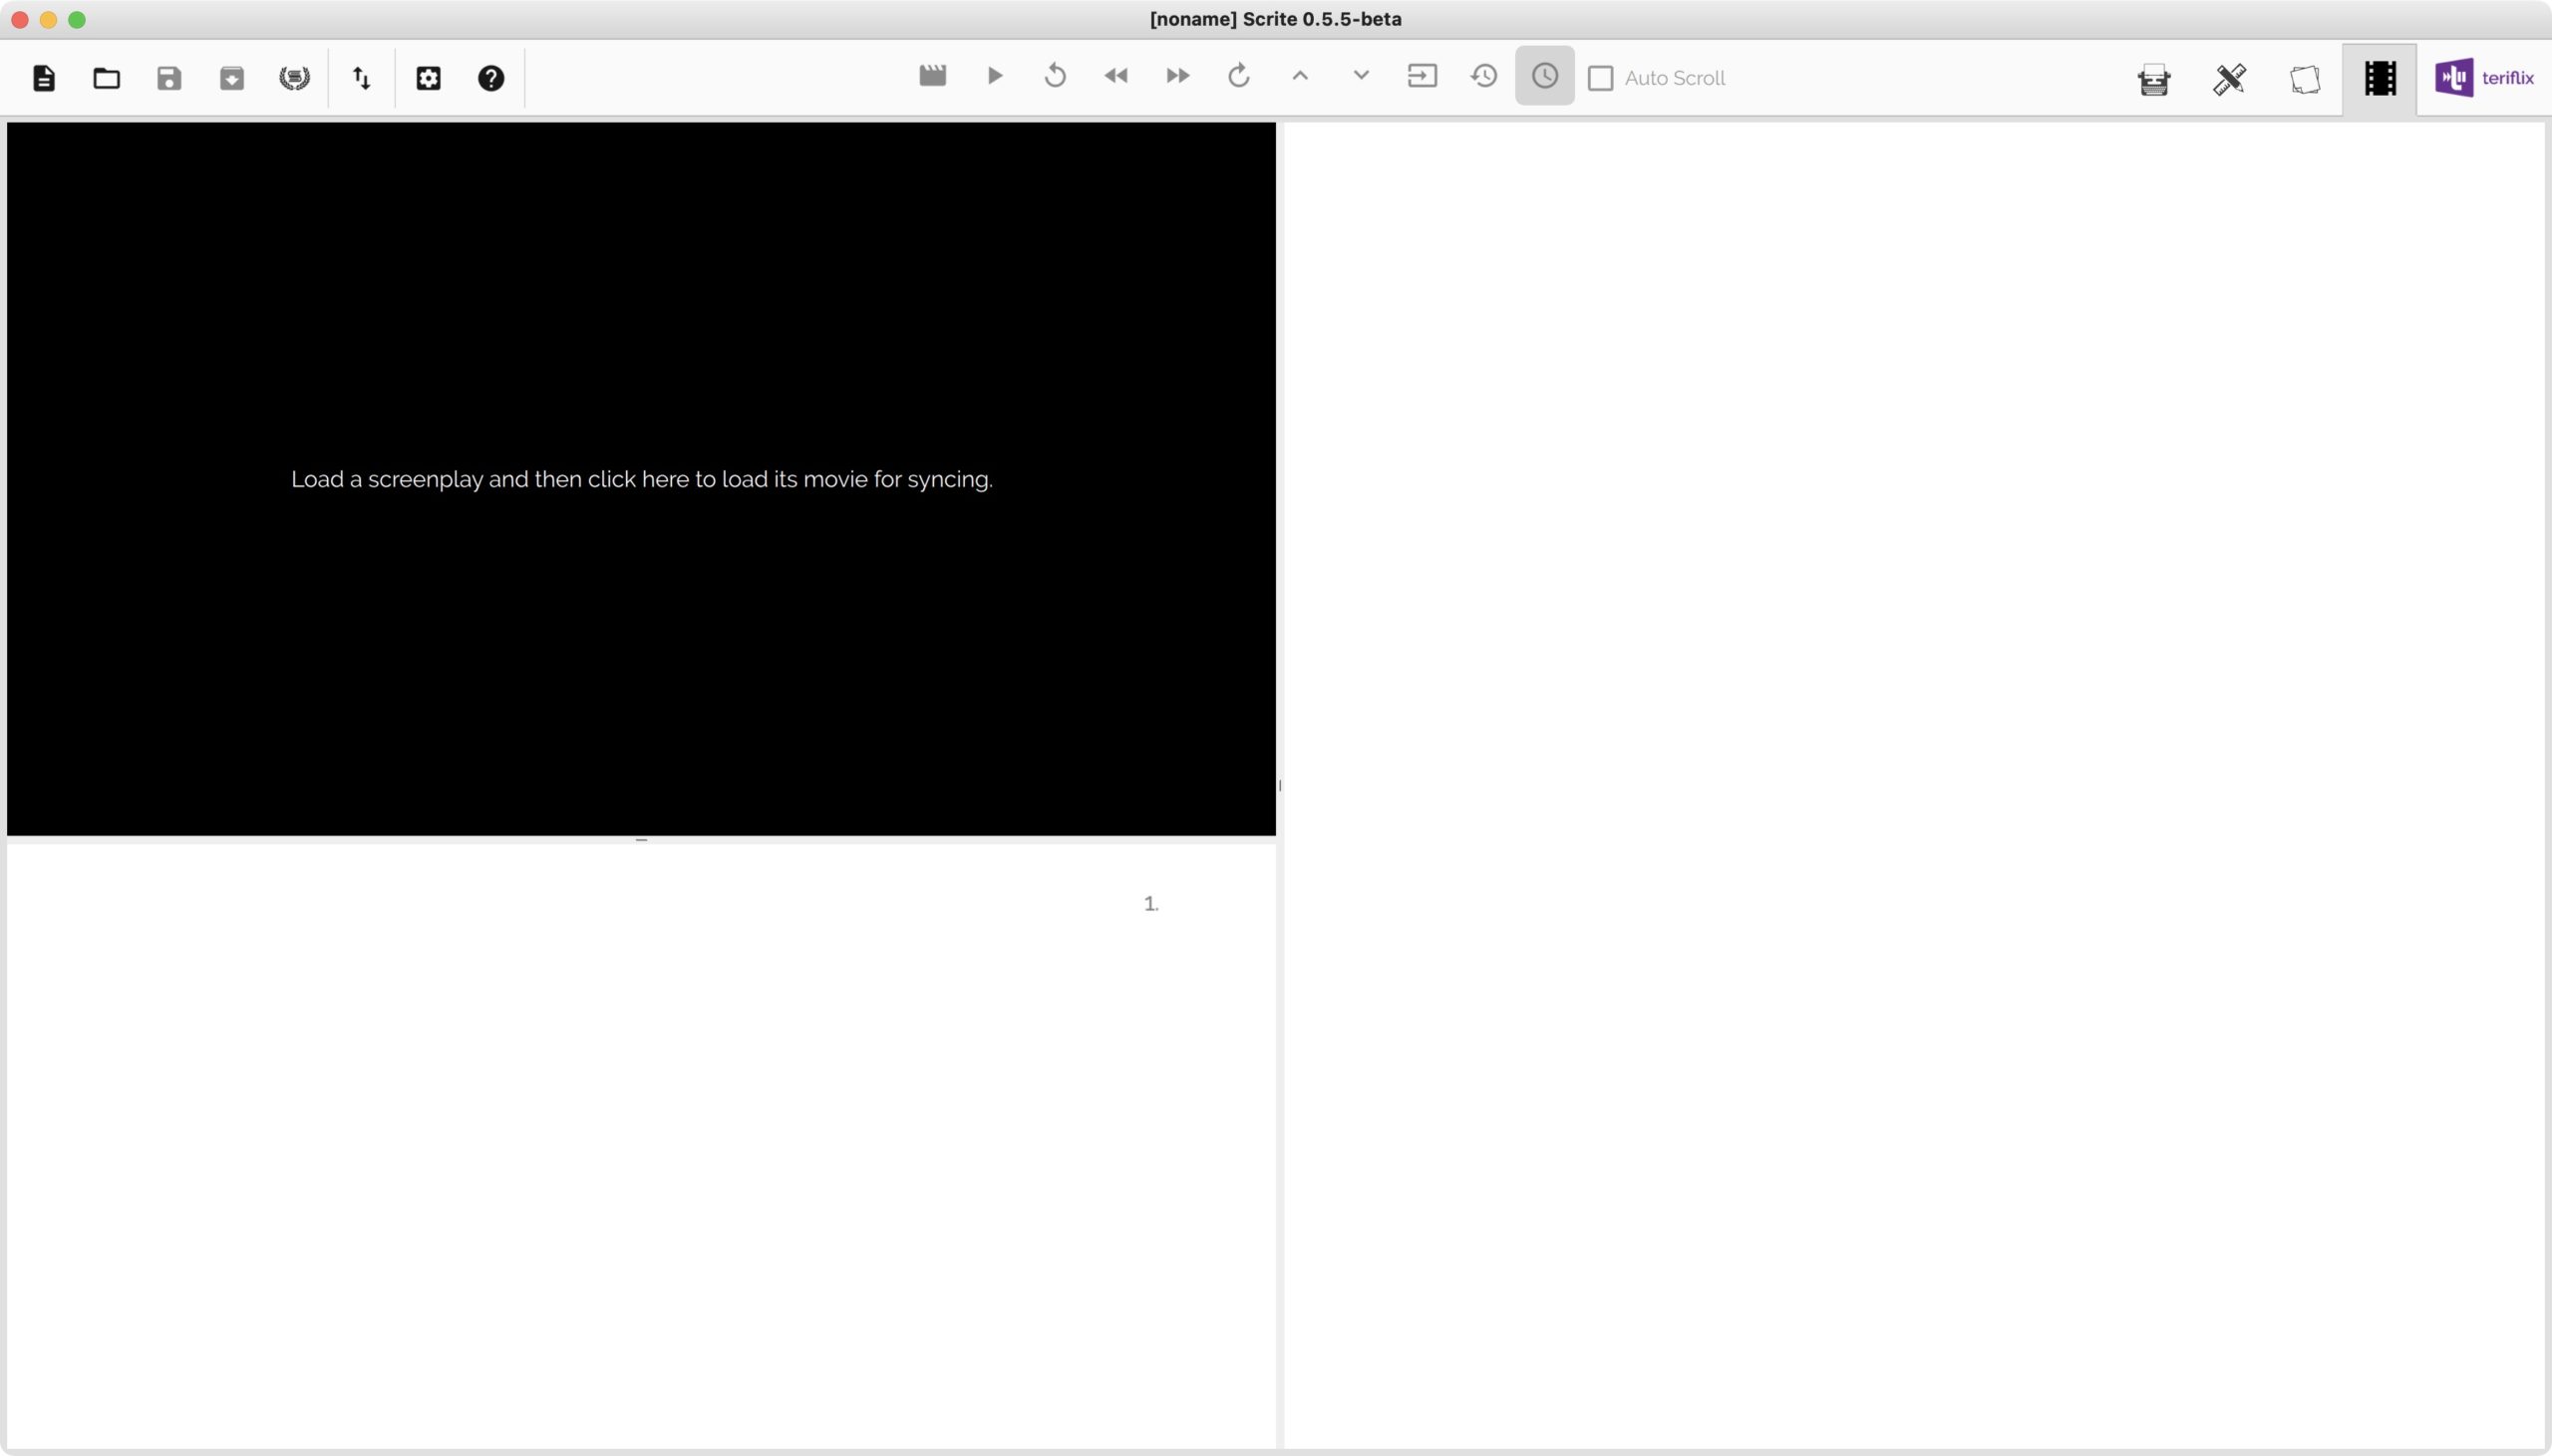
There are three sections in this UI.
- The black-rectangle on the top left is where you would load the video of your film.
- Right below it, a page-by-page scroll view of your screenplay will be displayed
- On the right you will get a list of scenes along with their page number and time offsets.
Also notice that a new toolbar shows up on the top for this tab.

From this toolbar, you can
- Load a film video (after opening a Scrite document)
- Play / Pause the film
- Rewind 10 seconds
- Rewind 500 ms
- Forward 500 ms
- Forward 10 seconds
- Jump to previous scene
- Jump to next scene
- Sync video time with screenplay time offset
- Reset all time offset settings
- Show/hide time column on the scene list panel.
- Enable auto scrolling.
Loading a Scrite Document
Let’s first open a Scrite document and load the screenplay and scene list panels. Here we have opened screenplay of Shuddhi.
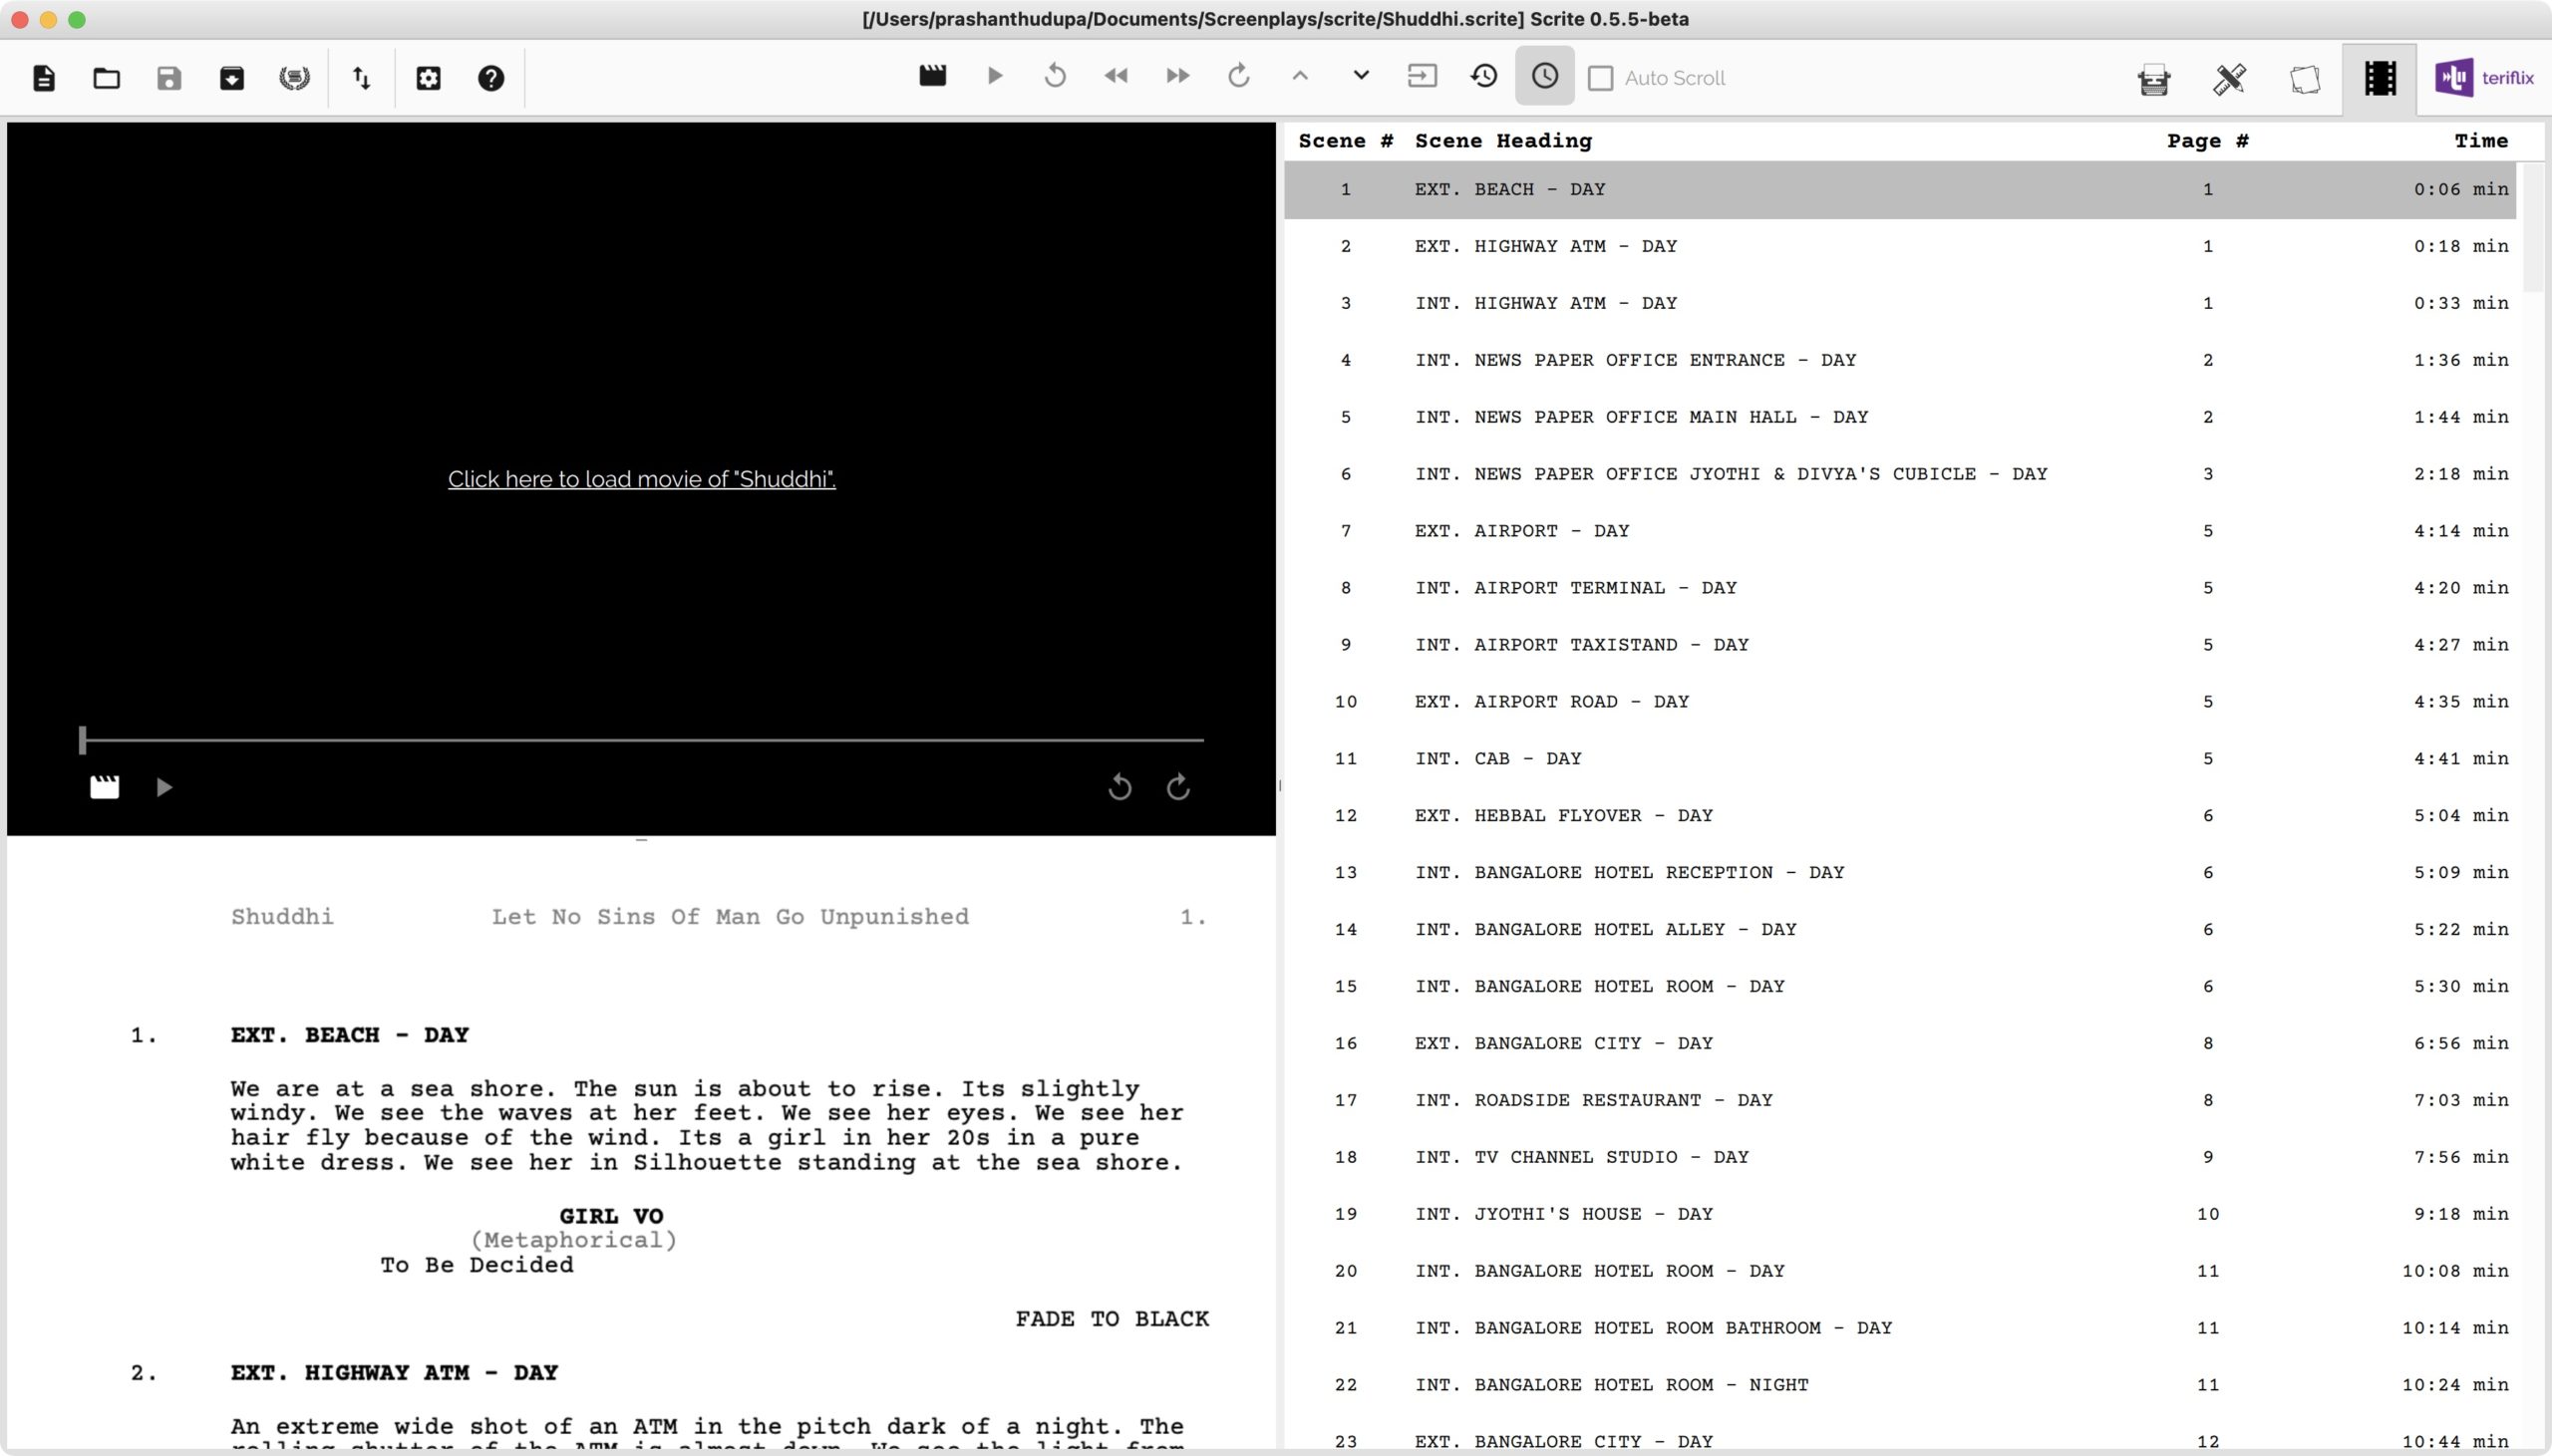
You can see a scrollable screenplay on the bottom left, and a scrollable scene list on the right. The scene list displays every scene in the screenplay along with the page number they would appear on (when printed) and the approximate time at which the scene occur in the film, assuming 60 seconds per page. (ProTip: You can change time per page in settings.)
Loading A Video
Click on the load video button in the toolbar and load a video of the film. Here we are loading the original high resolution video of the film, directly sourced from Director Adarsh Eshwarappa.
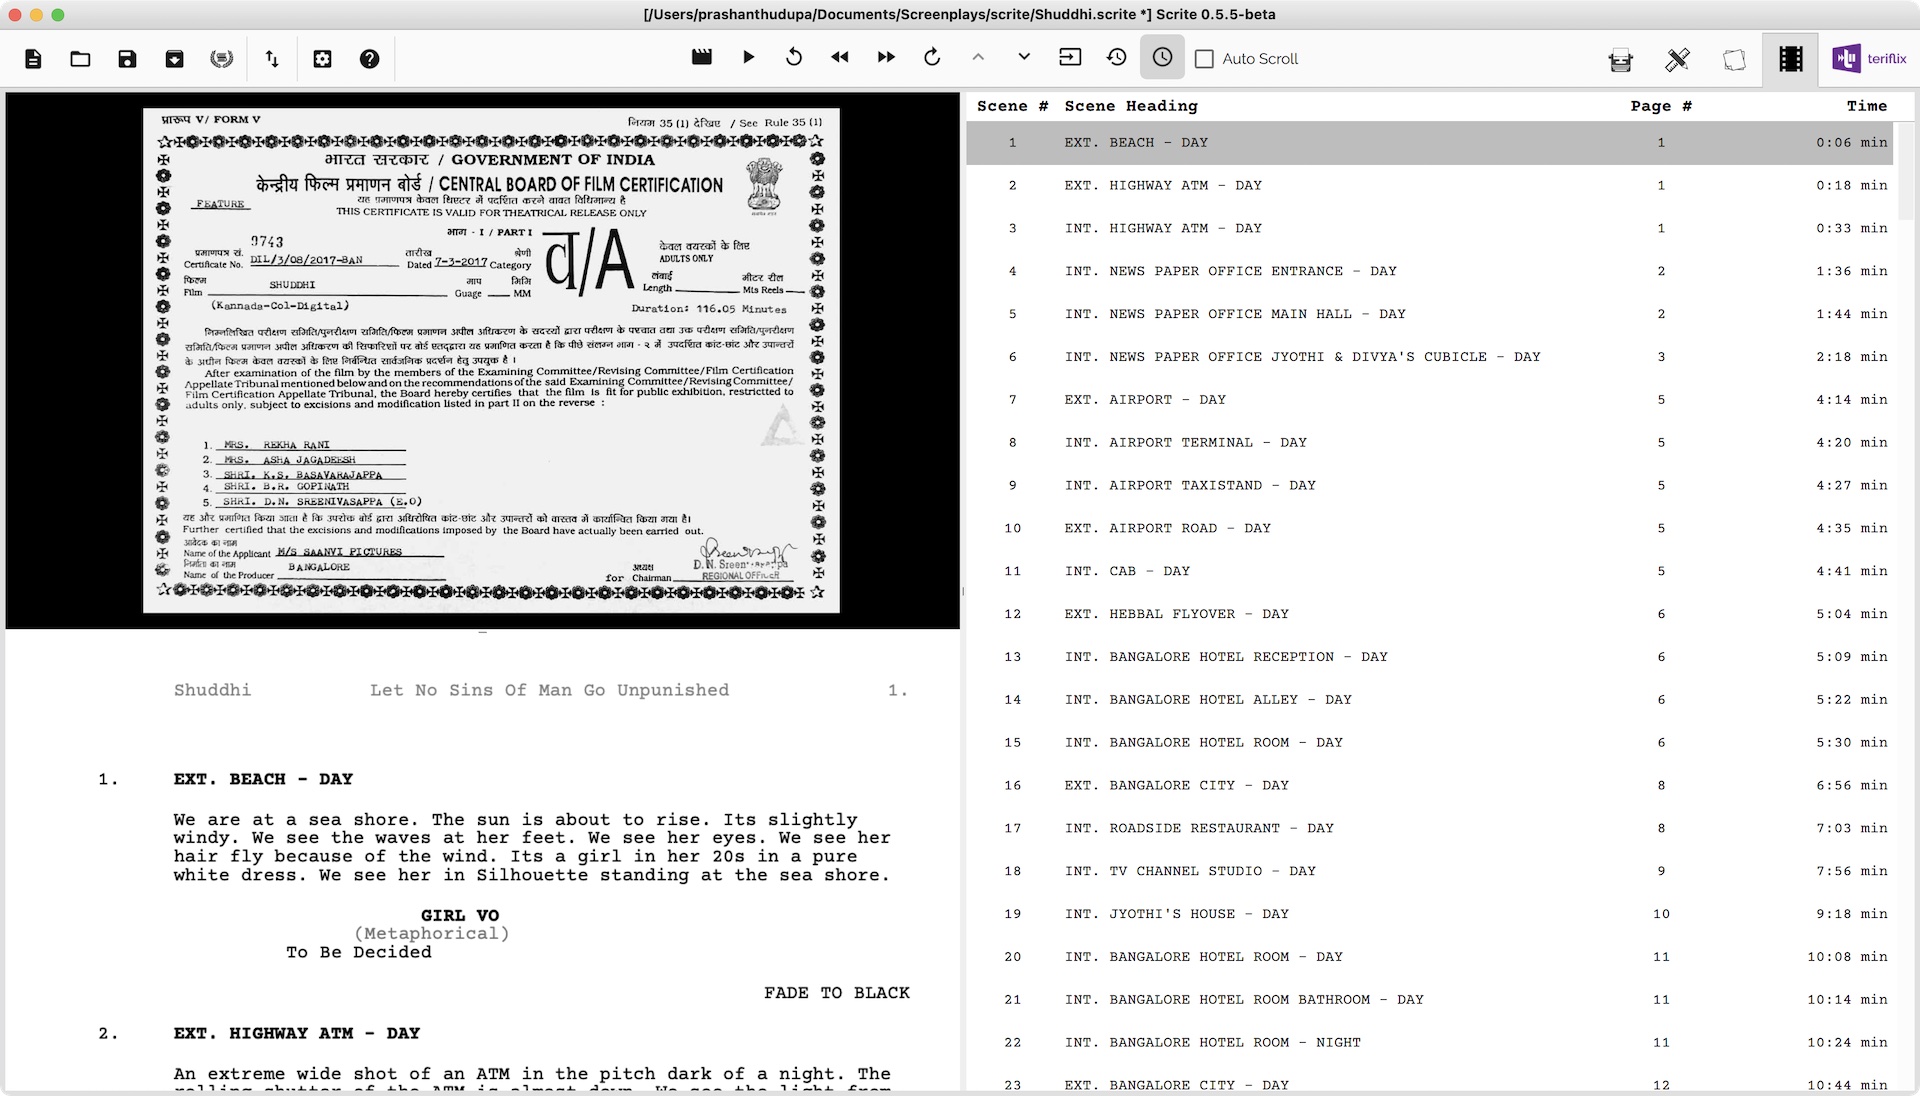
You can click on any scene on the scene list panel to forward the video to the time offset mentioned against that scene.
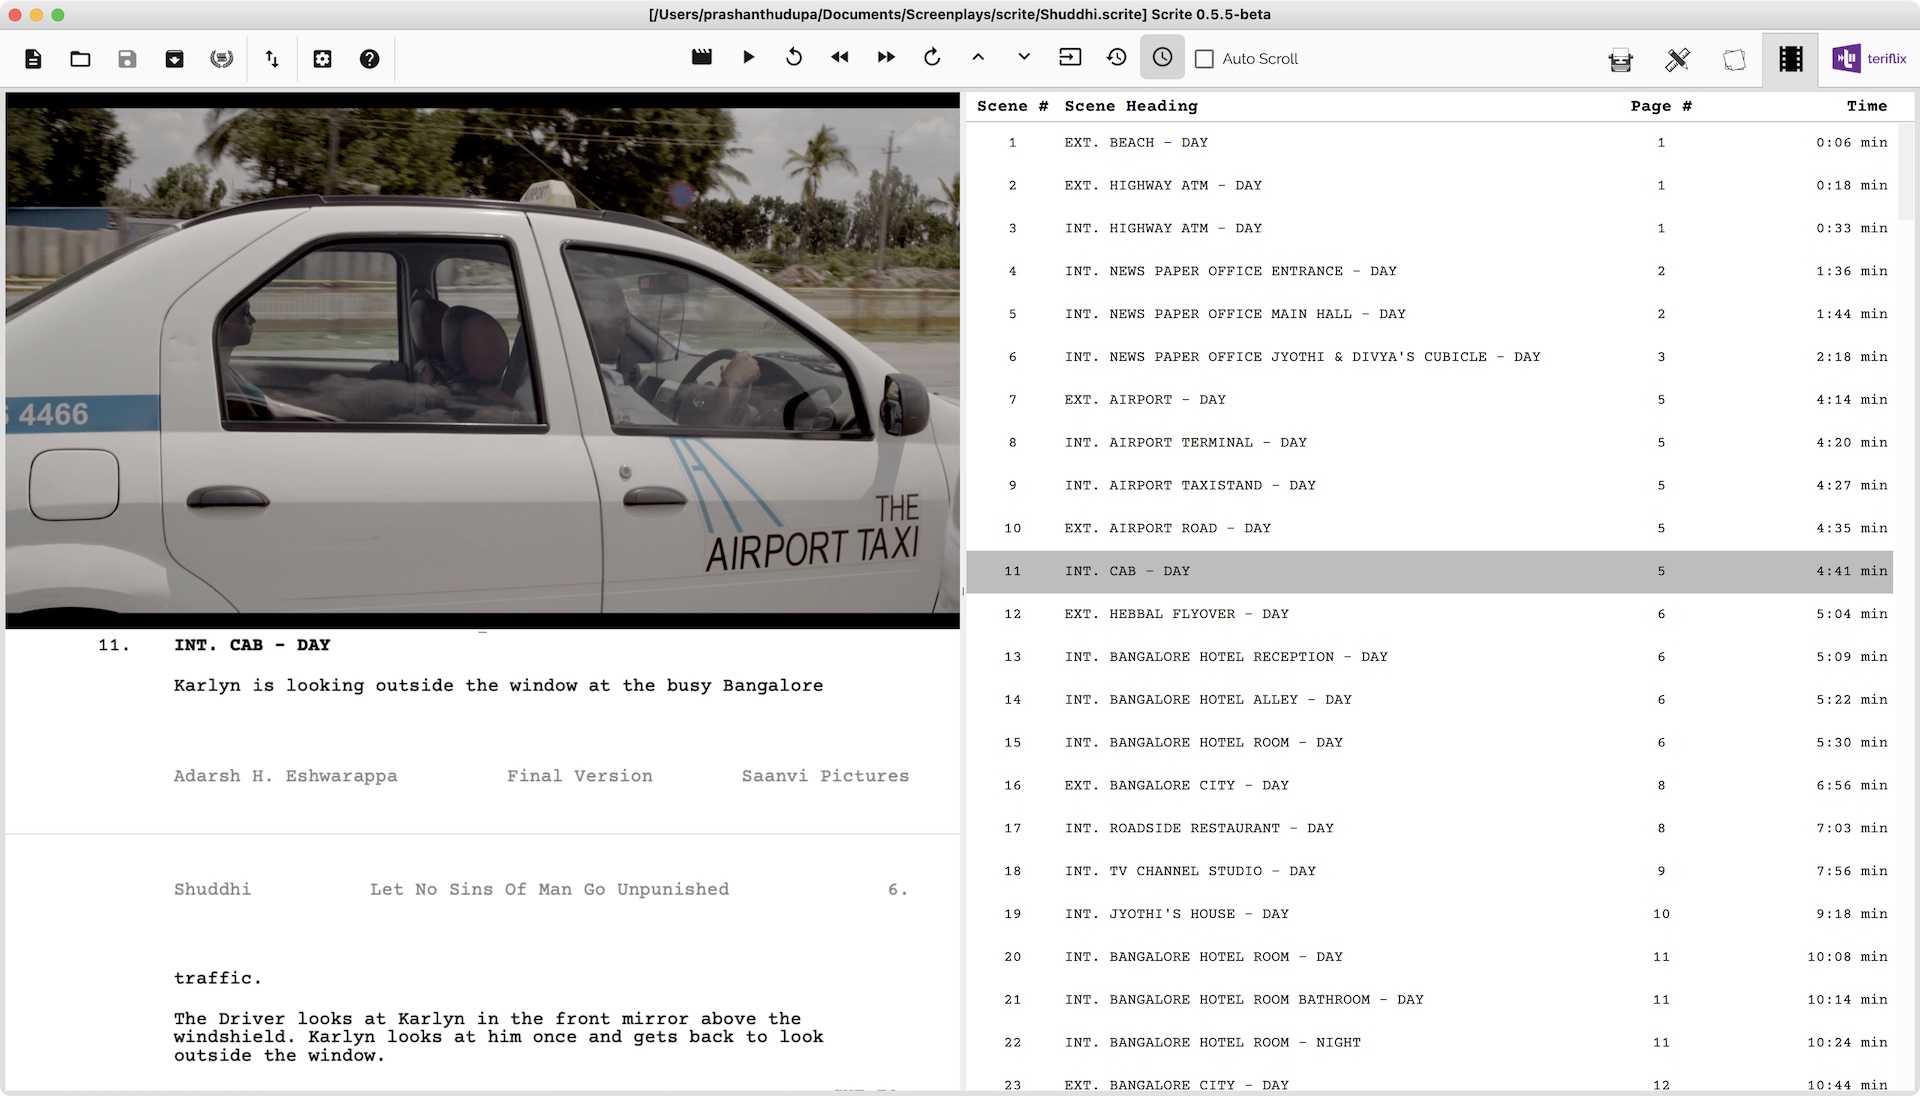
When you load the video for the first time, you will notice that the time offsets in the video are not in sync with the time offsets on the scene list panel to the right.
While it is true that screenplays are written such that each page on the screenplay translate to 1 minute on the film, you can never expect that to be 100% accurate.
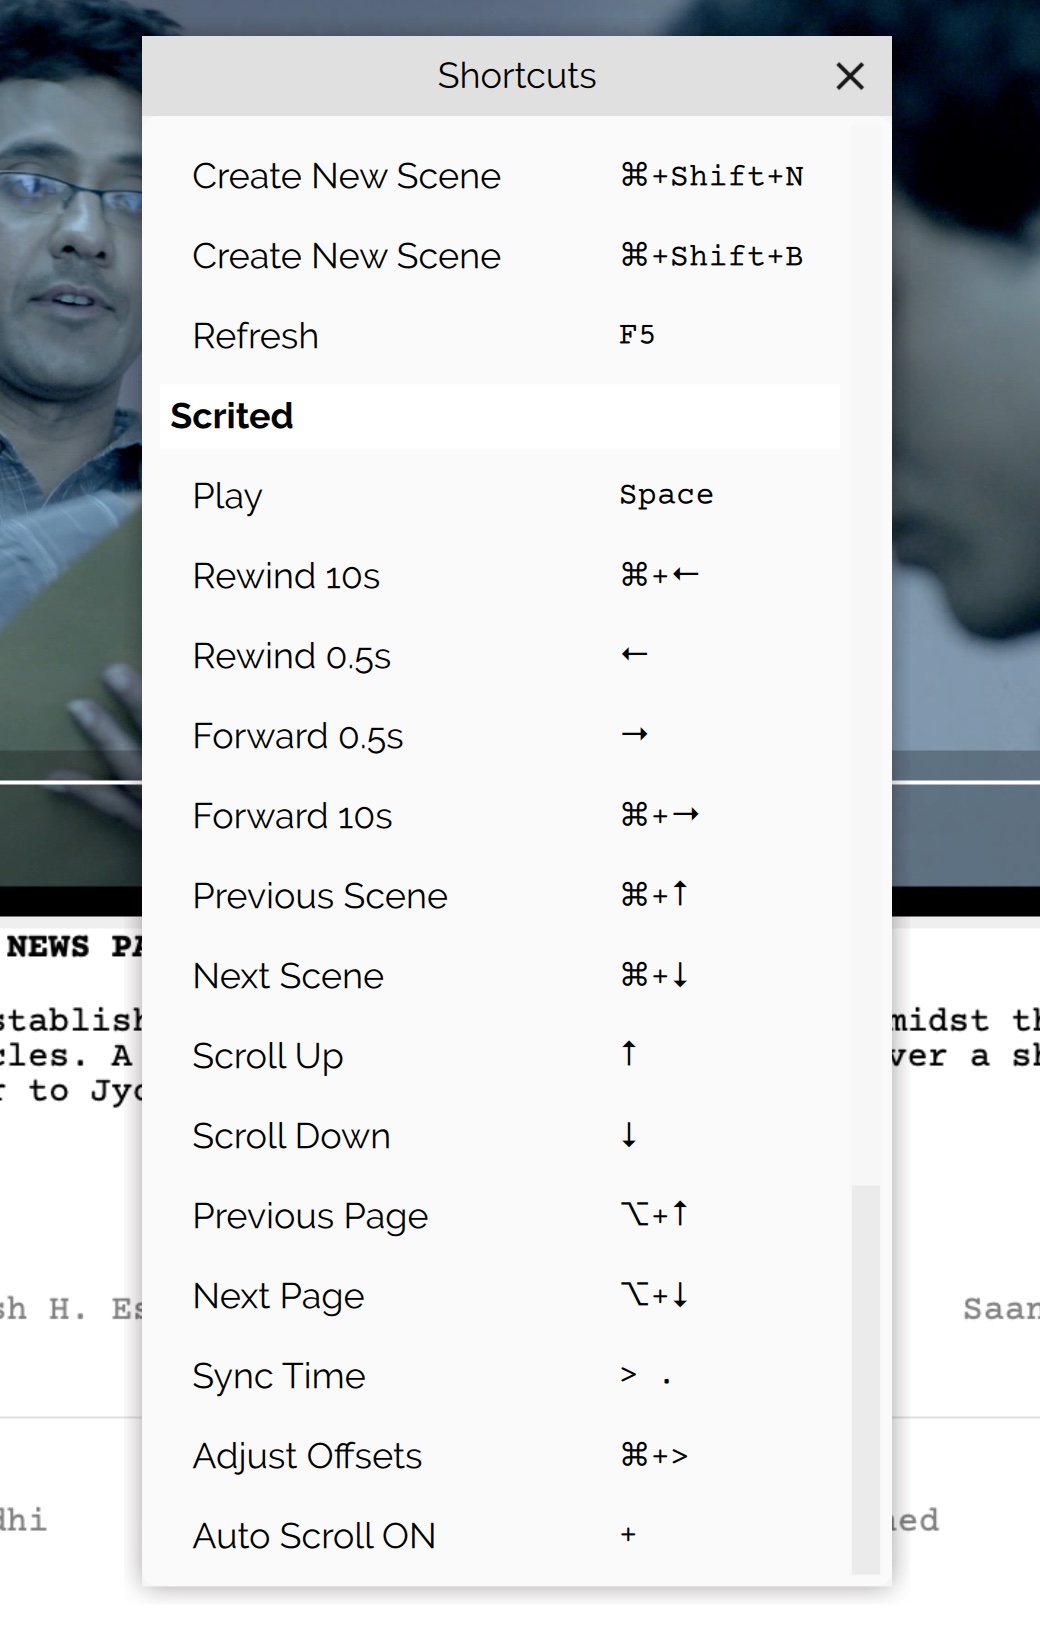
In the Scrited tab, you can manually sync video time offset with screenplay time offsets. For this, you can either use the toolbar icons or use the following keyboard shortcuts.
 Play / Pause the film (Space)
 Rewind 10 seconds (⌘/Ctrl + Left Arrow)
 Rewind 500 ms (Left Arrow)
 Forward 500 ms (Right Arrow)
 Forward 10 seconds (⌘/Ctrl + Right Arrow)
 Jump to previous scene (⌘/Ctrl + Up Arrow)
 Jump to next scene (⌘/Ctrl + Down Arrow)
 Sync video time with screenplay time offset of current scene (> or .)
 Reset all time offset settings
  Show/hide time column on the scene list panel.
- Auto Scroll Checkbox (+)
You also have the following additional keyboard shortcuts
- Scroll one line up (Up Arrow)
- Scroll one line down (Down Arrow)
- Scroll one page up (⌥/Alt + Up Arrow)
- Scroll one page down (⌥/Alt + Down Arrow)
- Sync video time with screenplay time offset of current scene AND adjust offsets of all subsequent scenes (⌘/Ctrl + >)
You can launch the keyboard shortcuts dock widget to take a look at the available keyboard shortcuts.
Using either the keyboard shortcuts or the buttons on the toolbar you can play the video and manually sync video time offsets with screenplay time offsets.
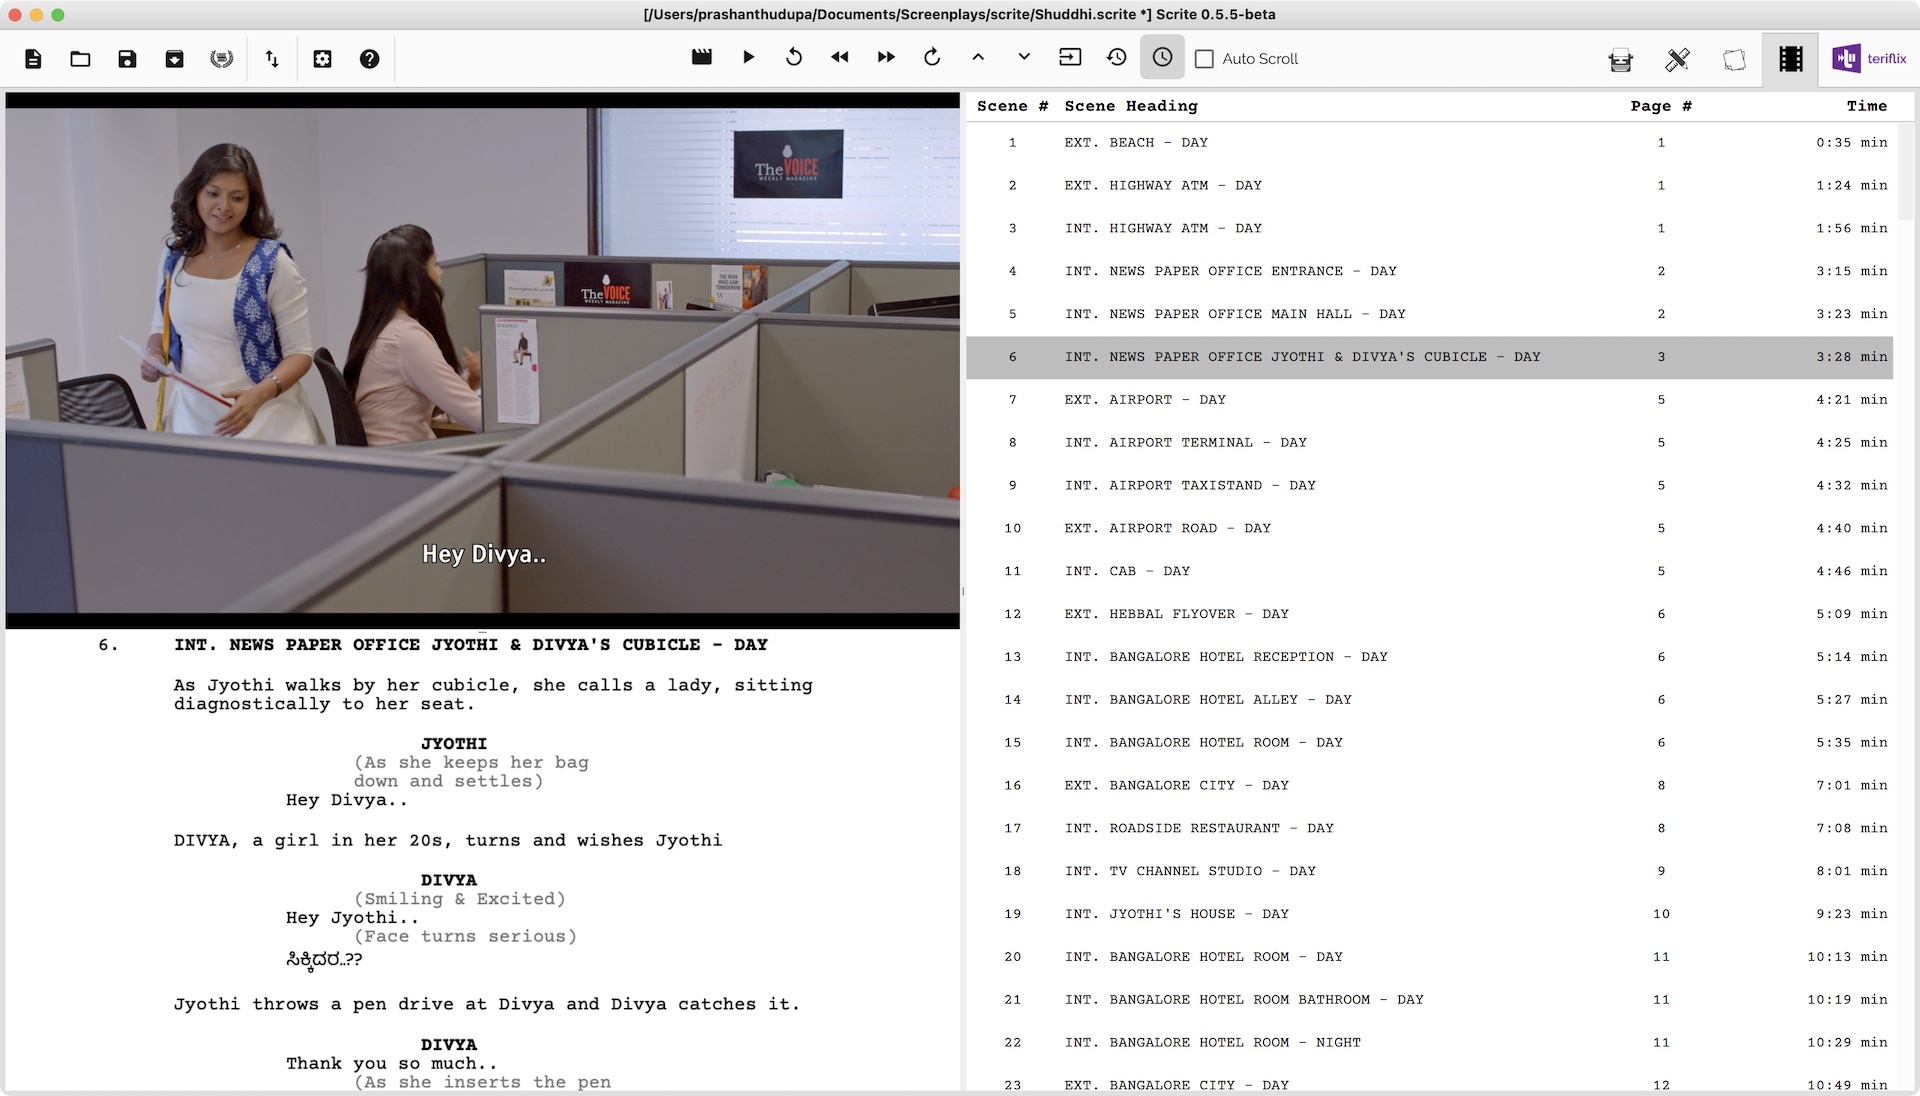
Offsets that you manually assign will be automatically saved in a JSON file within the same folder from where the video was loaded. The next time you load the video file, previously saved offsets will be considered. This way you wont have to repeat the process each time you load a video.
Once you have properly assigned offsets, you can check the “Auto Scroll” option on the toolbar to keep the video playback in sync with the screenplay. Auto scrolling doesn’t always get it right, because screenplays may not match the video 1:1. But its fairly accurate. If you don’t like auto-scroll, you can manually scroll the screenplay using up and down arrow keys.
Watch the video below for a live demo.
If you wish to take this feature for a test drive, download the latest Nightly Build and try it out. And most importantly, leave us a feedback on the forum.
NOTE: On Windows, please install video codecs from the open-source LAV Filters Project before trying to load videos on Scrite. Visit https://github.com/Nevcairiel/LAVFilters/releases to download the same.
Sample Videos
Here are a few videos created using the Scrited tab on Scrite using the screenplay and video of the film Shuddhi.